By Kyle Decker, FAST Facility Manager, ATC, CSCS (Glendale Location).

The importance of daily functional movements becomes amplified when wanting to achieve greatness in your sport. In this article, you’ll discover essential movements to serve as the foundation for building the strength, agility, and mobility needed to excel in any sporting endeavor.

A Functional Approach to Training

For years, we were conditioned to believe we must spend countless hours in the gym doing strength training and cardio exercise to achieve most fitness goals. However, discoveries in science and fitness have been uncovered in the last decade. For example, isolation exercises that work for only one muscle group at a time have become the norm. We now understand that the body works through a chain of movements rather than one isolated movement at a time. As a result, more people have begun performing functional training programs that work the entire body.

Functional training programs offer a fantastic solution for individuals with limited time but still desire to improve their fitness and strength levels. These programs engage the muscles to elicit increased effort, resulting in heightened strength and a boosted metabolism. By committing to a routine of functional movements, athletes cultivate a mindset of continuous improvement, setting the stage for long-term success.

Related Content >> Train Movement Not Muscles

5 Functional Movements

If you incorporate just five different functional movements in every workout, you engage multiple muscle groups throughout your body, infuse diversity into your routine, and effectively alleviate exercise monotony.

The five movements I recommend performing daily are: push, pull, hip-hinge, squat, and plank. Each of these movements requires multiple joints and body systems to work together, and they are also incorporated into activities we do every day. When you pick something up off the floor, you squat down to pick it up, pull it towards the body, and push it away to place it somewhere. A plank strengthens your abs, helping you maintain core control while lifting and carrying.

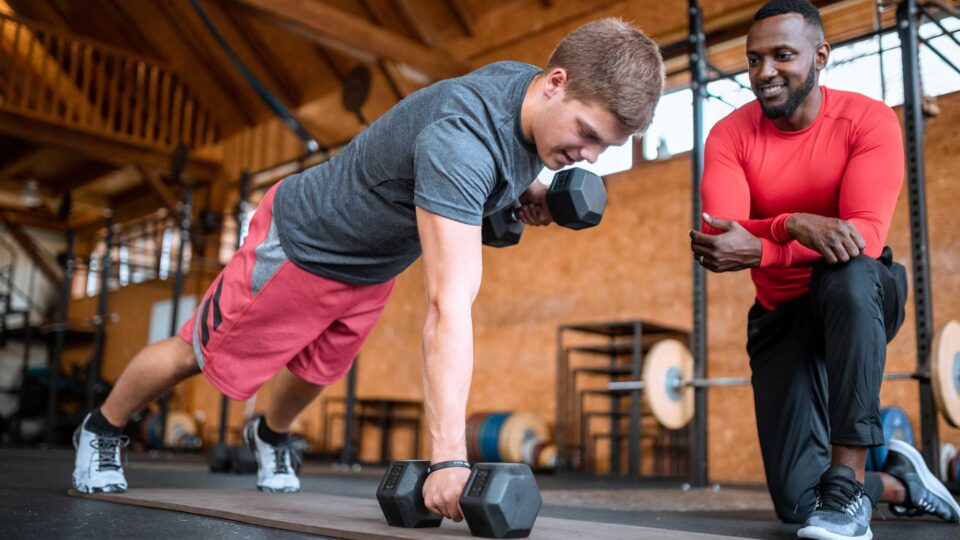
1. Push

Suggested exercises: push-ups, incline press, single-arm kettlebell or dumbbell press, push press

Trainer assisted client with incline press.

2. Pull

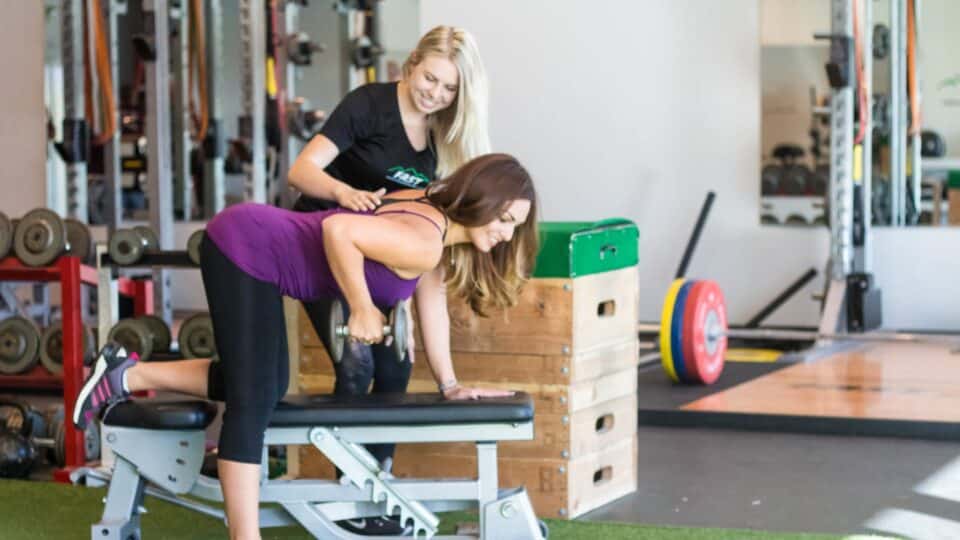
Suggested exercises: dumbbell rows, cable rows, pull-ups, lat pull downs

Young male athlete performing functional movements using cable row exercise.

3. Hip-Hinge

Suggested exercises: Kettlebell swing, Romanian deadlift, deadlift, glute bridge

Athlete performing kettlebell swing exercise.

4. Squat

Suggested exercises: Body weight squats, dumbbell goblet squats, weighted front/back squats, lunges, split squats

Young female athlete doing squats for a functional movement.

5. Plank

Suggested exercises: plank for time, plank with movement, bird dogs, side planks, heavy carries (farmer and suitcase)

Functional exercise: Women athlete performing plank exercise.

If these exercises are done correctly, every movement will work the part of the body it is focused on and other systems simultaneously. However, like most things in life, you can do too much. This program should only be followed three or four times a week: more than that would be overtraining and would not allow the body to recover fully.

Creating a Customized Functional Program

  1. Pick an exercise from each of the five functional movement categories
  2. Perform 3 to 5 sets of exercises during every workout.
  3. Follow the push, pull, hip-hinge, squat, and plank pattern
  4. Choose different exercises for movement patterns during the week.
  5. Boost your metabolism: add cardio to the end of workouts. Make it fun by doing hill sprints, rowing machines, climbing rock walls, or jumping rope.

Every total body functional workout should incorporate these five movements. This programming technique will help you spend less time at the gym, increase strength, and add variety to your activities. Find a FAST location near you to learn more about sports performance and personal training techniques today!

Foothills Performance Training is a group of locally-owned Phoenix personal training facilities that help people all over the valley reach their fitness goals. We provide hands-on, individualized training plans to clients of all ages and athletic abilities. We also offer a free assessment to evaluate your needs.

Whether you are home, traveling, or anywhere in between, exercise should be incorporated into your daily schedule. Exercise allows us to physically exert, but on top of that also sharpens us mentally. It’s been shown to improve symptoms of anxiety while decreasing the risk of cardiovascular disease. Exercise also is a way to build our immune system because it places physical stress on our bodies that we must adapt to over time. By exercising regularly, along with consuming nutritious foods, we can make sure that our daily performance is to the best of our ability. This can be done without ever leaving the comfort of your home.

Maintaining a healthy lifestyle, at home and away, is easier than you may think. By choosing to walk or ride a bike to locations nearby rather than driving your vehicle, you can burn extra calories and increase endurance. This is a great way to incorporate active recovery on top of regular exercise as well. Active recovery helps with muscle soreness and gives a way to exercise without overexerting and overusing muscles.

Below you’ll find a couple of different combinations of exercises you can do at home with supplies found in a typical household. Items such as a towel, milk or water jugs, chairs, and socks can be used to assist. Each workout is designed to work your full body, as well as work on flexibility and balance/coordination.

Workout 1:

Start with a 5-minute dynamic stretch:

  • Frankenstein’s 5/leg
    • Start standing with both feet together. Take a step and kick a straight leg up to tap toe with hand. Take a couple of reset steps. Repeat with the other leg.
  • Walking Lunges w/ twist 5/leg
    • Start with feet together. Take a long stride forward and bend your front knee, push hips forward to stretch hip flexor, twist trunk from side to side. Bring legs together and repeat on the other side
  • Inchworms 10
    • Start standing with feet together. Reach down and touch toes. Bend knees if needed to touch the ground, and walk hands forward until just in front of shoulders. Walk feet forward, keeping legs as straight as possible. Best done by flexing foot while bringing thigh to chest.
  • Pushup to Downdog 10
    • Begin in tall pushup position, with hands under shoulders. Perform a pushup, and once to the beginning position, push hips back and extend arms in line with the back. Try to place heels on the ground and push the head through the shoulders.

Exercises:

  • 2-leg Hamstring Curl (Eq Needed: Towel, Tile) 3×10
    • Start lying on your back on tile. Use a towel under your feet as a slider. If no tile is available, use a folder under your feet on the carpet. Push your hips off the ground with straight legs and pull your legs under your body.

  • Push up with Retraction of Scapula 3×10
    • Start in a tall plank position with your hands under your shoulders. Lower yourself until your elbows reach 90 degrees, then push yourself back up. Once in the tall plank position, allow your trunk to dip in while squeezing your shoulder blades together. Push back up to the tall pushup position and repeat.
  • 3 Point Milkjug Row 3×8/arm
    • Start With your feet about shoulder-width, place your hand on a chair. Pull the milk jug up through your elbow, making sure to squeeze your shoulder blade toward the center of your back.

  • Bearcrawl Isohold 3x:45
    • Start in a quadruped position, with shoulders stacked over hands and hips over knees. Lift knees off the ground 2-3 inches and hold. If you want a higher intensity, tap one knee to elbow, and repeat on the other side.

  • Downdog Pushups 3×10
    • Start in a tall plank position, and push hips back so that head is in line with arms. Bend the elbows and lower yourself as far as possible, then push back up.
  • Narrow Stance Squat to Wide Stance Squat with Pulse 3×12
    • Start with your feet just slightly less than shoulder-width apart. Squat down, then pulse 3 times before pushing back to the top. Take a step to the side that is slightly wider than shoulder-width and squat down, pulse three times and push back up. Repeat the narrow/wide stance.

Finish with 5 min cooldown:

  • Lower Trunk Rotations 10/side
    • Lay on your back with knees bend and together, arms out to the side, and palms up. Roll knees to right, while looking to the left, then rotate to the other side. Should feel stretch in the lower back.
  • Side-lying trunk rotation 10/side
    • Lay on your side with straight legs, with a pillow in front of you. Take the leg that is on top and bend it to a 90-degree angle, and place it on top of the pillow. Have your arms straight in front of you, and open one arm up, rotating around as far as you can without lifting the knee off the pillow. Repeat on the other side. Should feel stretch in middle to upper back
  • Hip Flexor Stretch 30/side
    • Kneel with one knee up and one knee down, and push hips forward while raising hands overhead. Should feel stretch in front of hip.
  • Kneeling Quad Stretch (couch stretch) 30/side
    • Kneel with one knee up and one knee down, resting the top of your back foot on your couch. Lower to the ground. Should feel a stretch in the quad

Workout 2:

Start with 5 min dynamic stretch:

  • Frankenstein’s 5/leg
    • Start standing with both feet together. Take a step and kick a straight leg up to tap toe with hand. Take a couple of reset steps. Repeat with the other leg.
  • Walking Lunges w/ twist 5/leg
    • Start with feet together. Take a long stride forward and bend your front knee, push hips forward to stretch hip flexor, twist trunk from side to side. Bring legs together and repeat on the other side
  • Inchworms 10
    • Start standing w feet together. Reach down and touch toes. Bend knees if needed to touch the ground, and walk hands forward until just in front of shoulders. Walk feet forward, keeping legs as straight as possible. Best done by flexing foot while bringing thigh to chest.
  • Pushup to Downdog 10
    • Begin in a tall pushup position, with hands under shoulders. Perform a pushup, and once to the beginning position, push hips back and extend arms in line with the back. Try to place heels on the ground and push the head through the shoulders.

Exercises:

  • Jump Squats 3×15
    • Start in a tall athletic stance, making sure feet are shoulder-width apart. Squat down, pushing hips back, and push up quickly into a jump. Land in the same position, and squat back down once feet touch the ground.
  • Crunchy Frogs 3×15
    • Start sitting on the floor, legs bent in front of you, and knees together. Rock back so that you’re balancing on your glutes, while straightening knees, and bring arms out to the sides of your body. Tuck knees in and bring arms around them, while still balancing. Release knees, and straighten back out. Repeat.
  • Tricep Dips on chair 3×10
    • Start with hands on the chair seat, and legs in front of you. The farther out your legs are, the hard this exercise will be. Lower yourself until your elbows reach a 90-degree bend and push back up.

  • Broomstick Row 3×15
    • Take two grocery bags and place a few cans of food in each, making sure they’re about the same size and weight. (duplicate cans work best). With a broom balanced on a chair, hang each bag on either side of the broom. Pick up the broom horizontally, hands about shoulder-width apart, and position yourself in an athletic stance, with a slight lean forward. Pulling through the elbows, and squeezing shoulder blades together, bring the broom up to the chest, slowly releasing it back to the bottom once you tap the chest.
  • Curtsy Lunges 3×10
    • Start in a tall athletic stance, cross left foot behind right and squat down as low as you can, push back up, and place foot back to shoulder width. Repeat with the other side.

  • Reverse Crunch 3×10
    • Laying on your back, position your head so that you can hold onto something heavy, either a couch leg or under a couch. Bend your knees, and lift them off the ground, and when ready, lift hips off the ground so that you are resting your body weight on your shoulders. Slowly lower your body down until your lower back touches the floor. Without dropping your feet to the ground, repeat.

Finish with 5 min cooldown:

  • Lower Trunk Rotations 10/side
    • Lay on your back with knees bend and together, arms out to the side, and palms up. Roll knees to right, while looking to the left, then rotate to the other side. Should feel stretch in the lower back.
  • Side-lying Trunk Rotation 10/side
    • Lay on your side with straight legs, with a pillow in front of you. Take the leg that is on top and bend it to a 90-degree angle, and place it on top of the pillow. Have your arms straight in front of you, and open one arm up, rotating around as far as you can without lifting the knee off the pillow. Repeat on the other side. Should feel stretch in middle to upper back
  • Hip Flexor Stretch 30/side
    • Kneel with one knee up and one knee down, and push hips forward while raising hands overhead. Should feel stretch in front of the hip
  • Kneeling Quad stretch (couch stretch) 30/side
    • Kneel with one knee up and one knee down, resting the top of your back foot on your couch. Lower to the ground. Should feel a stretch in the quad

Other Options

Lower body:

  • Bodyweight Squats (or with milk jug in goblet position)
  • Hamstring Curls on tile with towel/socks
  • Curtsy Lunges
  • Jump Squats
  • Jumping Lunges

Core:

  • Dead Bugs
  • Bear Crawl Iso Hold with Knee Tap
  • Birddog
  • Plank (or variations like a pledge, up & downs)
  • Crunchy frogs

Back and Chest:

  • Milk Jug Rows
  • Pushup (or variations like plyo, incline decline)

Arms:

  • Tricep Pushups
  • Milk Jug Curls
  • Tricep Dips on a chair
  • Broomstick Curls (or weighted backpack, grocery bag with even weight inside)
  • Pushup to Downdog

Maintaining overall fitness is a vital part of daily living, allowing us to perform and participate in all activities to the best of our ability. Utilizing active recovery, as well as these at-home exercise plans can help you get on the right track to achieving greatness. If you’re looking for more guidance in your workout routine, contact one of our FAST valley-wide locations today!


In honor of the Tokyo 2020 (2021) Olympics, this post is dedicated to a personal favorite of mine: the power clean. I get asked by many athletes, “how do I get stronger, faster, and more powerful?” First, we need to define “power.” Power is force over time. So, the more force produced in less time equates to more power. In the weight room, this can be achieved by developing type II fibers (fast-twitch) in the muscles. These fast-twitch fibers produce greater and quicker force.

What exercises help build type II fibers?

Compound exercises, such as squats, deadlifts, bench press, and split-squats are great places to start. However, there is one move above all else that will provide you with the most bang-for-your-buck when it comes to power development, the power clean.


What defines a power clean?

The power clean is the pinnacle movement for power production because it includes full-body and multi-joint movements. It’s a combination of a deadlift, high pull, shrug, and squat. That’s a lot of movement to cram in such a short amount of time (remember, less time & more force = more power). Because of the intricate nature of the power clean, it can take some practice to maintain proper form. This blog will provide a step-by-step guide to the movement and how to perfect it.


Step 1: pull

The first movement of the power clean is picking up the bar. This step will take place from the ground to the knees. Before you begin, keep your feet hip-width apart and have the bar directly over the base of your toes. Position your shoulders over the bar with your shoulder blades pulled back to help create tension through your back. As you pull, it is imperative that you have your hips and knees extend in one synchronous motion. This is where some athletes fault in their technique and can cause more problems later on in the move.

Man demonstrating power clean first pull

Step 2: pull again

This action will occur when the barbell passes the knees. The goal of the second pull is to get your hips to “drive” forward and help move the barbell in a straight vertical path. This is where you transition to the “triple extension” position through your ankles, knees, and hips. If one joint is not in an “extension” position, you are limiting your ability to produce power through the second pull. As you begin to maneuver yourself around the barbell to receive it in the “power position.” This is where athletes may fault while performing a power clean. Many try to move the bar around them when they should be moving their body around the bar.

power clean triple extension


Step 3: catch and receive

As the athlete performs the second pull, they will “feel” the weight of the bar traveling upward. This is a critical moment where the athlete will pull themselves under the bar to catch it in the “receiving” position. In many instances, coaches will tell their athletes to “jump” during the second pull to help achieve the “triple extension.” Coaching an athlete to “jump” during a power clean will often have the athlete spend more time in the air and limit their ability to pull themselves under the bar. I like to coach my athletes to “pull and drop” when receiving the bar. As the athlete drops to receive the bar, they will shoot their elbows forward, parallel to the ground, to catch the bar on the top of their shoulders in the quarter-squat position.

Man demonstrating power clean catch

The complexity of the power clean may seem intimidating, but when performed properly it can provide a training stimulus nearly unmatched by any other exercise. It’s one of the best training tools to teach athletes and everyday gymgoers to become more powerful. If you want to improve your performance, strength, and explosiveness, contact one of our FAST locations today!

At FAST there is nothing more important to us than your health and well-being, and we are open to serve you. The coronavirus (COVID-19) is an emerging, rapidly evolving situation, and we are working diligently to keep athletes, customers, staff, and referral partners updated on our policies and prevention preparedness.

We have been working closely with the Center for Disease Control (CDC) and state and local health officials to ensure our centers and clinical teams are taking the proper action to keep everyone safe and healthy.

In addition, we offer virtual training for athletes that are unable to come to our facilities. 

Current COVID-19 Policies

  • Effective 7/6/2021 – If you are fully vaccinated, you are no longer required to wear a mask. If you would like your therapist or tech to wear a mask, please let us know. We are more than happy to accommodate your request.
  • Per the CDC guidelines, frequent hand washing is safer than wearing gloves; therefore, gloves will not be worn unless requested. When requested, gloves will be single-use only.
  • We will continue to uphold our standard of excellence in cleaning and sanitation.
  • Any athletes or staff experiencing Covid-related symptoms (cough, sore throat, fever, shortness of breath, or other symptoms listed by the CDC known to be Covid related) will be sent home and asked to return when they have 3 continuous days, symptom-free, and without medication. Confirmed positive Covid patients must self-quarantine for 10 days and be symptom and medication free the last 3 continuous days before we will schedule an appointment.

Outside the Training Center

To ensure the health and safety of everyone in the clinic, we ask that athletes and staff follow the following guidelines outside of FAST, as well:

  • Wash your hands often with soap and water for at least 20 seconds.
  • Avoid close contact with people who are sick.
  • Avoid touching your eyes, nose, and mouth.
  • Stay home when you are sick.
  • Cover your cough or sneeze with a tissue and throw the tissue in the trash.
  • Clean/disinfect frequently touched objects and surfaces

We thank you for your patience as we navigate updates and changes so that we are able to continue to provide you excellent care and a safe environment.

Ready to get moving? In the gym, or at home – choose what feels right for you!

To start with mastering your core for golf, get comfortable with controlling your upper body and its strength. Do this without moving your hips and vice versa. Being able to create hip and torso dissociation is key to having a great swing. There are a few ways we can hone this skill. First, we want to practice the movement, then move onto controlling that movement with strength and intention. Lastly, add a dynamic piece like the golf swing or something similar to put it all together.

Fig. 1

Movement
Controlling the movement of your core will take the most time because it is the base to the swing. It is also re-teaching us how to move the way we want. One way we can do this is by using a band and strapping it around our hips while in the golf ready position (fig. 1). After getting the band set up we are going to rotate the hip left and right without moving our torso. This will help to create dissociation and take control of the trunk/hips.

Fig. 2

Strength
Adding strength to the movement that we have just mastered is our next step. I like to use the ½ kneeling position because it’s a nice stability component on top of the band we will use for resistance (fig. 2). Get into a ½ kneeling position with the band perpendicular to yourself. While using what we gained from controlling the movement, press the band in and out while not moving the hips at all for this step.

Fig. 3

Dynamics
Our dynamic component should simulate our golf swing as close as possible. I love the medicine ball scoop toss for this one. It will allow us to produce some power and strength in the torso, hips and core. This involvement of the body mimics features of our golf swing. It is good to use a light ball around 6 pounds so that we can throw it hard and fast, reinforcing swing speed (fig. 3).

Looking for a personal trainer to improve your golf game with golf specific workouts? Contact FAST for a free fitness assessment today.

We have been proud to serve our clients virtually over the last 6 weeks but are happy to announce that our FAST  clinics will fully re-open on Monday May 18th! The safety of our clients and staff are the highest priority, so you will notice some changes at your next visit.

In an effort to follow CDC and other health authority guidelines, we have implemented the following procedures:

One:

The client’s temperature will be taken before each workout session

Two:

All clients should use hand sanitizer before their workout session

Three:

All in-clinic sessions are by appointment only and are limited based on available space

Four:

A limited number of staff and clients will be allowed in the workout area at one time

Five:

We will provide contactless check-in for each client

Six:

Any equipment used will be sanitized before and after each workout session

As you know, we have always maintained a personal and small group training environment, and are accustomed to routinely cleaning the workout equipment. We feel this experience will create a safe and healthy environment and allow you to easily resume your in-person training with us.

We appreciate the opportunity to train with you and can’t wait to see you back in the clinic. Click here to request an appointment.

With the World Series coming up, were going to look at a few things that can help with training for the greatest sport of all, Baseball!

First off, we know that there is a lot of rotation that takes place in baseball.

Even though there is a lot of rotation that takes place in this sport while throwing and hitting, this does not mean that we should solely work on exercises that include rotation. Mobility, strength, and power are also major aspects of the sport and its demands.

Think of a pitcher’s hips and thoracic cavity during the pitching delivery. During this movement, both the hips and shoulders must be able to rotate and even dissociate from each other in order to develop the most amount of power. In turn, it will create more velocity on the pitch.

Pause the television next time while watching a baseball game at any point before the pitcher delivers the pitch and look at the hips and the shoulders. There is a lot of separation that takes place throughout the pitching delivery. Moreover, there is a lot of stress placed on the shoulders and elbow if you are a baseball pitcher. Knowing that throwing a ball overhand is not easy on the shoulders, and being able to maintain or gain mobility through the thoracic cavity will help not only increase velocity but help maintain good shoulder health too.

Pitchers do need to develop strength in addition to mobility to be able to reach top velocity.

The power comes from the ground up. If we can develop a good lower body strength, the pitcher will be able to produce more power and velocity on the pitches. A great strength training exercise that can help with this is the deadlift.

Lastly, pitchers are not the only players on the field who need to keep their shoulders in mind while training.

If you really pay attention to a player when they dive, you will notice quite a few arm angles that may look like they hurt. Thus, our training program needs to include not only complete shoulder strength and stability but mobility as well. Including this into our training programs will allow the body to withstand these awkward positions that the body takes on during a game or season.

When creating your exercise programs for your sport, try to think of all aspects of the game including the minor details. By doing so we can hopefully improve your ability and your durability to play longer with fewer injuries. Come in for a free fitness assessment at your nearest FAST location and gain the competitive edge that you desire.

Enjoying a smoothie after a great workout is one way to fuel the body and start the recovery process. Sometimes knowing what should go in that smoothie can be challenging. Just like a balanced meal is what we may be striving for in our day to day eating a balanced smoothie is just the same. We want a good balance of protein, carbs, fats, fruits, and vegetables.

With building a balanced smoothie we need to have an easy to follow step by step process to ensure we use quality ingredients that are health conscious.

Step One:

Choose a liquid and preferably one not loaded with sugar like fat-free cow’s milk, unsweetened almond/coconut milk, water or green tea would all be great options.

Step Two:

Choose a protein powder such as whey, casein, egg or a plant source such as rice or peas.

Step Three:

Choose a vegetable that is either super green in color or one that mixes easily. One that we recommend would be spinach, pumpkin or celery.

Step Four:

Choose a healthy fat such as pecans, walnuts, all-natural peanut butter, and chia or flax seeds.

Step Five:

Choose a healthy fruit such as frozen berries, frozen cherries, apples or bananas.

Step Six:

Choose a topper for some added flavor such as shredded unsweetened coconut, cinnamon or plain yogurt.

Using these step by step processes can ensure you a healthy and balanced shake! For more information on healthy eating and a healthy lifestyle contact our FAST trainers today for a free fitness assessment! 

A new challenge in life can seem like a daunting task. While that feeling is definitely normal,, challenges should also be viewed as something to overcome and as a tool for growth. This blog is for any parent who is signing their child up for their first exposure to the weight room and for the athlete who is about to challenge themselves in order to get better at their respective sport. Although there will be many lessons learned along the way, these five tips will certainly help shape expectations and create positive long-term physical and mental changes.

1. Success Takes Time

You don’t become faster after a few weeks of training and you don’t gain ten pounds of muscle from a few weeks of training. Goals like this take a combination of two things; time and discipline. Any athlete must be prepared to put in consistent work and effort whenever they step into the weight room. It can be frustrating to not see immediate results, but it’s important to stay patient and trust the process. Along with being consistent with your training, it’s helpful to understand that most adaptations from training take time.

2. Be Okay with Making Mistakes

In the weight room, there are countless mistakes that happen during a one-hour workout session. It is important to realize that it is normal. Failing and mistakes, however, are two different terms. A mistake is an action that is misguided while failure is a lack of success. It is important as an athlete to understand the difference. Mistakes pave the way for learning. If every exercise was completed with flawless form, where would the learning come from? There must be feedback from your coaches and yourself. You must be made aware of the mistake for you to learn how to not make that mistake again. Rather than thinking of mistakes as something bad, approach it as an opportunity to learn and become a better athlete from it.

3. Consistency is Important to Learn Early

Consistency is the name of the game when it comes to the weight room. You could have the best coach in the world, and he/she could write the best program in the world, but the inability to follow the program makes that program useless. There’s a great chance you’re going to get better if you stick to that formula. Don’t learn this lesson after 1-2 years of on and off training. Have discipline early on and you will see the results in the future. Consistency doesn’t just mean showing up either. Consistency means showing up with purpose and intent. Try and learn something new from each session. Rather than showing up and going through the motions, show up with a desire of pushing yourself to get better.

4. Don’t be Afraid to Let Out Your Personality

Some characteristics that most strength and conditioning coaches see from young athletes are shyness and a fear of saying the wrong thing. We, as coaches, aspire to get to know you as much as we can so that you can feel comfortable in the weight room. As a young athlete, don’t feel like all the pressure is on you. Don’t be afraid to ask the coaches questions or get to know fellow athletes who are sharing the same space as you. We want you to enjoy your time with us and feel excited about coming back.

5. Leave the Ego Behind Before You Enter the Gym

Leave whatever notions or opinions you have about how good you are and just be prepared to work hard. Too often, athletes come in with over-inflated egos and are worried about being the smartest person in the gym or being the most athletic person in comparison to their peers. It doesn’t matter. The only thing that does matter is trying to accomplish your goals and trying to get better at your sport. Usually, the athletes who see the most results are those that consistently ask questions, work hard, and act as a novice. The athlete who thinks he or she knows it all is typically the one that stays around the same level they did once they started the training program. Have a different mentality once you step into the gym. A mentality that enforces growth and challenges your mind and body.

For more tips and tricks in-person visit your closest FAST location for a Free Fitness Assessment!

Summer has arrived and it comes with sunny skies and considerably warmer temperatures. School is out and everyone is looking forward to fun vacation plans. As important as it is to have a good time, too often we forget to take care of our bodies during the hot summer months. Staying hydrated this summer will help everyone stay happy and healthy while enjoying their adventures.

Here are some tips to help you out!

  1. Start each day with a glass of water. Drinking a glass of water first thing in the morning helps your body re-hydrate and jump starts your metabolism. This simple practice will get the body ready for activities for the day after being asleep for several hours
  2. Invest in a reusable water bottle and take it everywhere with you. This practice is good for your body and the planet. Reusable bottles are durable and reduce a major pollutant; plastic waste. Make it a goal or challenge to see how many times you can refill it throughout the day.
  3. Choose water instead of soda or other drinks. Since our bodies are made up largely of water, putting water into them will produce the best results. Water has zero calories in comparison to the high-sugar beverages too often used for hydration purposes. While other beverages can help you stay hydrated, water is the best option for hydration, body function and overall health.
  4. Try infused waters. Many people do not drink water because of the taste or lack of flavor. There are many combinations of fruit and herbs that can be added to water. These additions can contain health benefits and great taste. Add strawberries, basil and lemon to your water for a refreshing flavor boost that helps keep you hydrated.
  5. Snack on produce with high water content. Snacks like watermelon, cucumber, strawberries, celery or bell peppers have high water content. These and many other fruits and vegetables have more than 90% water in addition to their many nutrients and can help with your water intake. Reach for these in addition to your glass of water to help you hydrate and stay healthy this summer.

These five tips can help everyone to have an enjoyable and healthy summer. There are so many benefits to drinking water and being hydrated, such as: regulated blood pressure, more effective metabolism, improved brain and heart health, better cognitive function, and body temperature regulation. Staying hydrated will allow everyone to have the best summer possible. In the end you’ll be happy knowing that you not only had the best summer, but also took great care of your body.

If you have any further questions about ways to stay healthy for the summer then get in contact with a FAST coach today!

Foothills Acceleration and Sports Training (FAST) is empowered by Foothills Therapy Partners (FTP).